honeywell th4210u2002 install manual

The Honeywell TH4210U2002 is a programmable thermostat designed for energy efficiency and precise temperature control. It offers a user-friendly interface and compatibility with various HVAC systems. Part of the T4 Pro series, it ensures optimal performance and comfort. The thermostat includes a UWP mounting system, decorative cover plate, and AA batteries for easy installation and operation;
1.1 Overview of the Honeywell TH4210U2002 Model
The Honeywell TH4210U2002 is a T4 Pro Programmable Thermostat designed for energy efficiency and precise temperature control. It features a large, easy-to-read display and customizable programming options. Compatible with various heating and cooling systems, this thermostat ensures optimal performance and user convenience. The package includes a UWP mounting system, decorative cover plate, screws, anchors, and AA batteries, making installation straightforward. Its advanced features and user-friendly design make it an ideal choice for home comfort and energy savings.
1.2 Importance of Proper Installation
Proper installation of the Honeywell TH4210U2002 thermostat is crucial for ensuring optimal performance, safety, and energy efficiency. Incorrect wiring or setup can lead to system malfunctions, reduced efficiency, or even safety hazards. Following the installation manual carefully ensures correct connections and configuration, preventing potential issues. It’s essential to verify compatibility with your HVAC system and double-check all wiring connections before powering up. Improper installation may void the warranty or cause operational problems, so attention to detail is paramount for reliable and efficient thermostat operation.
Package Contents and System Requirements
The Honeywell TH4210U2002 package includes the thermostat, UWP mounting system, J-box adapter, decorative cover plate, screws, anchors, and 2 AA batteries. It requires a compatible HVAC system with standard wiring connections to function properly. Ensure your system meets the specified voltage and compatibility requirements for optimal performance. Refer to the manual for detailed specifications and compatibility checks.
2.1 Items Included in the Package
The Honeywell TH4210U2002 package includes the T4 Pro thermostat, UWP mounting system, Honeywell Standard Installation Adapter, decorative cover plate, screws, anchors, and 2 AA batteries. The thermostat is compact, measuring 4-49/64 in x 4-49/64 in x 11/32 in. Additional items like the J-box adapter and optional cover plate ensure a seamless installation. The package provides all necessary components for a straightforward setup, making it easy to install and operate the thermostat efficiently.
2.2 System Compatibility and Requirements
The Honeywell TH4210U2002 is compatible with single-stage heating and cooling systems, including gas, oil, electric, and heat pumps. It requires a 24V AC power supply and supports systems with R and Rc terminals. The thermostat works with 1H/1C configurations and includes a slider tab for R and Rc setup. It is designed for universal compatibility with most HVAC systems. Proper wiring and installation are essential for optimal performance. The thermostat also supports automatic system changeover for convenience.
Installation Steps for Honeywell TH4210U2002
Turn off power, remove old thermostat, label wires, mount new device, connect wires, restore power, and test system to ensure proper function and safety.
3.1 Pre-Installation Checklist
Before installing the Honeywell TH4210U2002, ensure the power to your HVAC system is off. Verify system compatibility and gather necessary tools. Check if your system requires a C-wire or if it supports dual R-wires. Ensure the thermostat is suitable for your heating and cooling configuration (e.g., 1H/1C systems). Close the furnace door securely and have fresh AA batteries ready. Review the installation manual to understand the process and safety precautions. This preparation ensures a smooth and safe installation experience.
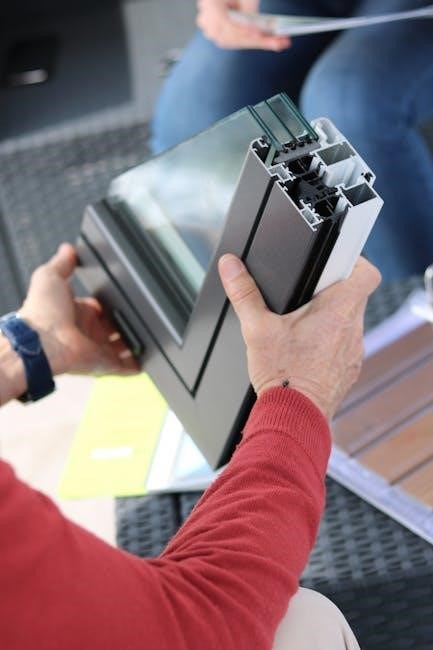
3.2 Mounting the Thermostat
Mount the Honeywell TH4210U2002 using the provided UWP mounting system. Start by attaching the mounting bracket to the wall, ensuring it’s level and secure. Use the screws and anchors from the package for a sturdy installation. If needed, install the J-box adapter for compatibility with standard electrical boxes. Finally, snap the thermostat onto the mounting bracket. The decorative cover plate can be added for a polished appearance, concealing any gaps or irregularities on the wall. Follow the manual for precise alignment and a secure fit.
3.3 Wiring Connections
Connect the wires to the Honeywell TH4210U2002 thermostat according to your system type. For a 1H/1C system, attach the Y wire to the Y terminal, W to W, and G to G. Ensure the R and Rc terminals are configured correctly using the slider tab, depending on whether you have one or two R wires. Turn off the HVAC system power before starting. Match each wire to the correct terminal and secure them firmly. Refer to the manual for specific wiring diagrams and instructions tailored to your system configuration. Double-check all connections for accuracy and safety.
3.4 Final Installation Checks
After completing the wiring and mounting, perform a final system test. Ensure the thermostat display is on and functioning. Verify that all wires are securely connected and the thermostat is properly mounted. Check that the R and Rc terminals are configured correctly. Perform a system test by pressing and holding the CENTER and buttons for 3 seconds to enter the advanced menu, then selecting TEST. Test heating, cooling, and fan modes to ensure proper operation. Finally, confirm that the thermostat is level and the batteries are correctly installed. Complete the setup by turning the HVAC power back on. Ensure the thermostat operates smoothly in all modes before finalizing the installation. Verify that the slider tab for R and Rc terminals is set according to your system requirements. Ensure the decorative cover plate is securely attached. Double-check all connections for tightness and accuracy. Confirm that the system changeover is set correctly (manual or automatic) as per your preference. Ensure the thermostat is properly paired with your HVAC system for optimal performance. Make sure all safety precautions are followed and the system is ready for normal operation. Ensure the thermostat display is clear and all buttons are responsive. Verify that the system operates quietly and efficiently after installation. Ensure all advanced features are accessible and functioning as intended. Check that the system maintains the desired temperature accurately. Ensure the programmable features are set up correctly for your daily schedule. Verify that the thermostat’s energy-saving features are enabled if desired. Make sure the system is compatible with your home’s HVAC configuration. Ensure the thermostat’s time and date are set correctly. Verify that the system responds correctly to temperature adjustments. Ensure the thermostat’s screen brightness is adjusted to your preference. Check that all installer setup parameters (ISU) are configured properly. Ensure the system operates in the correct mode (heat, cool, or auto). Verify that the system’s fan operation is set to your preference (auto or on). Ensure the system’s geofencing and smart features are enabled if applicable. Make sure the system is connected to your Wi-Fi network if required. Verify that the system’s remote access features are functioning correctly. Ensure the system’s software is up to date. Check that the system’s energy usage reports are accessible. Verify that the system’s maintenance reminders are enabled. Ensure the system’s filter change reminders are set up. Check that the system’s humidity control features are functioning if applicable. Ensure the system’s dehumidification settings are configured correctly. Verify that the system’s ventilation settings are set to your preference. Make sure the system’s advanced diagnostics are enabled. Check that the system’s troubleshooting features are accessible. Ensure the system’s technical support information is available. Verify that the system’s warranty information is registered. Ensure the system’s user manual is stored for future reference. Check that all packaging materials are disposed of properly. Ensure the area around the thermostat is clean and free of debris. Verify that the thermostat’s installation location is optimal for accurate temperature sensing. Ensure the thermostat is installed away from direct sunlight and drafts. Check that the thermostat’s mounting system is secure and level. Verify that the thermostat’s wiring is neatly organized and secured. Ensure the thermostat’s batteries are fresh and correctly installed. Check that the thermostat’s display is free of any damage or defects. Verify that the thermostat’s buttons are functioning smoothly. Ensure the thermostat’s advanced features are fully operational. Check that the thermostat’s compatibility with your HVAC system is confirmed. Ensure the thermostat’s performance meets your expectations. Verify that the thermostat’s installation was completed successfully and safely.

Wiring and Terminal Configuration
The Honeywell TH4210U2002 features labeled terminals (Y, W, G, R, Rc) for straightforward wiring. Configure the R and Rc terminals using the slider tab. Proper wiring ensures smooth operation of heating and cooling systems.
4.1 Understanding the Terminal Designations
The Honeywell TH4210U2002 thermostat features clearly labeled terminals to simplify wiring. The Y terminal connects to the compressor contactor, while the W terminal links to the heating relay. The G terminal controls the fan relay, and the R and Rc terminals provide power to the system. Proper configuration of these terminals ensures seamless communication between the thermostat and your HVAC system. Understanding each terminal’s function is crucial for accurate wiring and system operation.
4.2 Connecting Wires for Heating and Cooling Systems
Connect the Y wire to the Y terminal for the compressor contactor. The W wire links to the W terminal for the heating relay. The G wire connects to the G terminal to control the fan relay. Ensure the R and Rc terminals are configured correctly based on the number of R wires present. Properly connecting these wires ensures accurate communication between the thermostat and your HVAC system, optimizing performance and efficiency.
4.3 Configuring the R and Rc Terminals
Properly configure the R and Rc terminals using the slider tab. If only one R wire is present, set the slider to connect R and Rc. For systems with two R wires, separate them by moving the slider to the opposite position. This ensures correct power supply to the thermostat and prevents system malfunctions. Always refer to the manual or manufacturer guidelines for specific configurations to maintain optimal functionality and avoid damage to the thermostat or HVAC system.
System Setup and Configuration
The Honeywell TH4210U2002 thermostat requires initial setup to enable features like automatic changeover and programmable scheduling. Press and hold buttons to access the advanced menu, configure settings, and optimize energy efficiency for precise temperature control and home comfort.
5.1 Initial System Setup
Initial system setup for the Honeywell TH4210U2002 thermostat is straightforward. Begin by installing the batteries and ensuring the power to your HVAC system is turned on. Press and hold the CENTER and buttons for 3 seconds to access the advanced menu. Navigate to settings like automatic changeover, system mode, and programmable scheduling. Configure these options to optimize energy efficiency and ensure proper system operation. This step is essential for enabling features like automatic heating and cooling control, tailored to your comfort needs.
5.2 Programming the Thermostat
Programming the Honeywell TH4210U2002 thermostat allows you to set custom temperature schedules for energy efficiency and comfort. Use the buttons to navigate to the programming menu and set temperature preferences for different days or time periods. Select options for wake, leave, return, and sleep periods. Ensure the system is configured for heating or cooling modes as needed. The thermostat also offers advanced features like automatic changeover and energy-saving settings to optimize performance. Proper programming ensures your system runs efficiently and maintains desired temperatures throughout the day.
5.3 Advanced Setup Options (ISU)
The Honeywell TH4210U2002 offers advanced setup options through Installer Setup Utility (ISU). Access ISU by pressing and holding the CENTER and buttons for 3 seconds to enter the advanced menu. From there, configure parameters like system type, changeover settings, and fan operation. Adjustments can be made for heat pumps, two-stage systems, or other specialized HVAC configurations. These settings ensure the thermostat operates optimally with your specific system, enhancing performance and energy efficiency. Refer to the manual for a detailed list of ISU parameters and options.

Troubleshooting Common Issues
The Honeywell TH4210U2002 may face issues like no display, incorrect temperatures, or system not turning on. Check power, batteries, and wiring connections. Ensure the HVAC power switch is on. For persistent problems, perform a system test via the advanced menu.
6.1 Diagnosing Installation-Related Problems
Common installation issues include no display, incorrect temperatures, or the system not turning on. Check if the power switch for the HVAC system is on and batteries are correctly installed. Verify all wiring connections are secure and match the terminal designations. Ensure the furnace door is closed securely. If the thermostat doesn’t power up, inspect the R and Rc terminals for proper configuration. Refer to the advanced menu for system tests to identify specific malfunctions.
6.2 Resolving System Operation Issues
If the system doesn’t heat or cool, check the thermostat’s mode and ensure it’s set to the correct option (Heat/Cool/Auto). Verify the temperature setting is appropriate. Check the system changeover setting, ensuring it’s configured for automatic or manual operation as needed. Review the Installer Setup Parameters for proper configuration. If issues persist, perform a system test by entering the advanced menu and selecting the TEST option to cycle through heating, cooling, and fan modes. This helps identify specific operational faults.

Maintenance and Care
Regularly clean the display and check battery levels. Replace AA batteries as needed. Ensure wiring connections are secure and free from corrosion for optimal performance and reliability;
7.1 Regular Maintenance Tips
Keep the thermostat clean by gently wiping the display and exterior with a soft cloth. Check and replace AA batteries annually or when the low-battery indicator appears. Ensure all wiring connections are secure and free from corrosion to maintain proper functionality. Regularly inspect the thermostat’s mounting system for stability and adjust if necessary. Avoid exposing the device to extreme temperatures or moisture to preserve its performance and longevity. Schedule annual HVAC system checks to ensure the thermostat operates efficiently with your heating and cooling units.
7.2 Replacing Batteries
To replace the batteries in your Honeywell TH4210U2002 thermostat, first, ensure the system is powered off. Locate the battery compartment, typically behind the thermostat’s faceplate; Remove the faceplate by gently pulling or unscrewing it. Take out the old AA alkaline batteries and insert new ones, aligning the plus and minus signs correctly. Replace the compartment cover and reattach the faceplate. Finally, test the thermostat to confirm it’s functioning properly. Replace batteries annually or when the low-battery indicator appears to maintain optimal performance.
Frequently Asked Questions (FAQs)
Common questions include installation challenges, system compatibility, and troubleshooting. Users often inquire about programming schedules, battery replacement, and resolving display issues. These FAQs provide quick solutions.
8.1 Common Questions About Installation
Common questions about installing the Honeywell TH4210U2002 include ensuring the power is off, correctly connecting wires, and configuring R and Rc terminals. Users often ask about system compatibility, mounting the thermostat, and installing the optional cover plate. Additionally, questions arise about battery placement and ensuring the furnace door is closed during installation. These queries are addressed in the manual to help users achieve a smooth and correct setup process for optimal thermostat performance.
Manufacturer Support and Resources
8.2 Troubleshooting Frequently Asked Questions
FAQs about troubleshooting the Honeywell TH4210U2002 include resolving display issues, addressing no-heat or no-cool problems, and fixing wiring connections. Users often inquire about system test procedures, error messages, and battery replacement. Common questions also involve ensuring proper R and Rc terminal configuration and checking if the furnace door is closed. These issues are covered in the manual to help users identify and resolve common operational problems efficiently.