total gym assembly manual

Welcome to your Total Gym assembly guide! This comprehensive manual will walk you through setting up your equipment step-by-step. With proper assembly, you’ll enjoy a functional, safe, and effective workout experience.
1.1 Overview of Total Gym Equipment
The Total Gym equipment is a versatile, all-in-one workout system designed for strength training, cardio, and flexibility exercises. It features a durable frame, a glideboard, and an adjustable incline system to target various muscle groups. The equipment includes components like pulley assemblies, wing grips, and accessory hitch pins, allowing for a wide range of exercises. Models such as the Total Gym 1000, Supreme, and FIT vary in features but share a common goal of providing an effective, space-saving solution for home workouts. The system is known for its smooth motion and adjustable resistance levels, making it suitable for users of all fitness levels. Proper assembly ensures optimal performance and safety.
1.2 Importance of Proper Assembly
Proper assembly of your Total Gym equipment is crucial for ensuring safety, stability, and optimal performance. A well-assembled unit provides a smooth, even motion and prevents potential hazards like loose parts or structural instability. Improper assembly can lead to equipment malfunction, injury risks, or reduced effectiveness of workouts. Following the manual ensures all components, such as pulleys, cables, and grips, function correctly. Correct assembly also prolongs the lifespan of the equipment, maintaining its durability and resale value. Always refer to the provided instructions or instructional videos for guidance. If unsure, consult customer support to avoid mistakes. Proper assembly is the foundation for a safe and successful fitness journey with your Total Gym.
Tools and Parts Required
Assembling your Total Gym requires specific tools and components. Essential tools include a hex key, wrench, and screwdriver, while parts like pulleys, cables, and wing grips are crucial.
2.1 List of Tools Needed for Assembly
To assemble your Total Gym, gather the necessary tools to ensure a smooth process. You’ll need a hex key (or Allen wrench) for bolts, a wrench for tightening, and a screwdriver for screws. Additionally, have a socket set handy for larger bolts and a measuring tape for alignment. Pliers may be useful for gripping small parts, and lubricant can prevent friction in moving components. Ensure all tools are easily accessible to avoid delays. Some tools, like the hex key, may be provided with your Total Gym, while others, like a wrench, you may already have. Organize these tools beforehand for efficient assembly.
Your Total Gym assembly requires several key components. Start with the frame and base, which form the foundation of the equipment. Next, locate the glideboard and rails, essential for smooth movement during exercises. The pulley system and cables are critical for resistance adjustments. Wing grips and accessories, such as harnesses or attachment points, enhance versatility. Additional parts include pins, bolts, nuts, and washers for securing components. Ensure all hardware like hex bolts, nylon nuts, and flat washers are accounted for. Accessories like training deck cards or squat stands may also be included, depending on your model. A thorough review of the parts inventory ensures nothing is missing before assembly begins. Proper identification of each part is crucial for a successful setup. Follow the step-by-step guide to assemble your Total Gym safely and efficiently. Start with unpacking and organizing all components, then build the frame and base. Carefully unpack all components from the box and lay them out on a flat surface. Begin by identifying the glideboard assembly, pulley system, wing grips, and hardware. Separate the bolts, nuts, and washers to avoid confusion. Refer to the parts list in the manual to ensure all items are included. Organize smaller parts like pins and spacers in labeled containers for easy access. Double-check the inventory to confirm nothing is missing or damaged. This step ensures a smooth assembly process and prevents delays. Once everything is sorted, proceed to the next step with confidence. Proper organization is key to assembling your Total Gym efficiently. Begin by attaching the base to the main frame using the provided bolts and washers. Tighten them securely to ensure stability. Next, connect the side rails to the frame, aligning the pre-drilled holes. Use the hex bolts and nylon nuts to fasten them in place. Make sure the frame stands upright and is level on the ground. Refer to the manual for specific torque settings to avoid over-tightening. Once the frame and base are assembled, double-check all connections for safety and durability. A sturdy frame is essential for the overall functionality of your Total Gym. Proceed only when the structure feels solid and even. This foundation supports all other components; Begin by aligning the glideboard with the frame, ensuring it fits snugly into the designated slots. Secure it using the provided pins and bolts, tightening them firmly. Next, attach the rails to the frame using the hex bolts and washers. Ensure the rails are level and properly aligned with the glideboard. Tighten all connections to the specified torque to prevent loosening during use. Once the rails are in place, double-check the alignment to ensure smooth movement of the glideboard. Finally, lubricate the rails with silicone spray for optimal glide performance. Always refer to the manual for precise bolt torque specifications to guarantee safety and functionality. Properly installed rails and glideboard are crucial for effective workouts. To install the pulley system, start by attaching the pulleys to the frame using the provided bolts and washers. Ensure they are securely fastened and aligned properly. Next, thread the cables through the pulleys, following the diagram in the manual. Attach the cables to the glideboard and the resistance arms using the cable clips or hooks. Tighten the cables by adjusting the pulley tension screws until there is no slack. Double-check all connections to ensure they are tight and properly seated. Finally, test the system by pulling on the cables to confirm smooth operation. Proper installation of the pulley system and cables is essential for the functionality and safety of your Total Gym. Always refer to the manual for specific torque and tension specifications. Once the main frame and glideboard are assembled, focus on securing the wing grips and accessories. Attach the wing grips to the sides of the glideboard using the provided bolts and washers. Ensure they are tightly fastened to prevent any movement during use. Next, install any additional accessories, such as the harness or leg pulley bracket, by aligning them with the designated mounting points. Use the accessory hitch pins to secure these components firmly. Finally, test all attachments by gently tugging on them to confirm stability. Properly securing these parts ensures a safe and effective workout experience. Always refer to the manual for torque specifications and accessory alignment guides. This step completes the assembly process, making your Total Gym ready for use. Always follow safety guidelines to avoid injuries. Ensure the equipment is used correctly and within its weight capacity. Read the manual thoroughly before use. Always ensure the workout area is clear of obstacles and provides enough space to move safely. Before use, inspect the equipment for damage or wear. Follow the weight capacity guidelines to avoid overload. Supervise children and pets during workouts; Wear proper workout attire, avoiding loose clothing that may catch on parts. Use the safety hitch pins correctly to secure attachments. Never exceed the recommended incline levels or modify the equipment without authorization. Regularly check and tighten all bolts and connections to maintain stability. Keep the glideboard and rails clean and free from debris to ensure smooth operation. Failure to follow these guidelines may result in injury or equipment damage. Always prioritize caution when assembling and using your Total Gym. Caution labels are placed on critical areas of the Total Gym to alert users of potential hazards. Always read and follow these warnings carefully to ensure safe operation. The equipment is designed for a maximum weight capacity, exceeding this limit can lead to structural damage or injury. Never use damaged or worn-out parts, as they may fail during use. Keep loose clothing and long hair tied back to avoid entanglement in moving components. Avoid overloading the pulley system or using unauthorized attachments, as this can compromise stability. Failure to follow these precautions may result in serious injury or equipment malfunction. Always refer to the manual for specific hazard information and safety instructions. Proper assembly and maintenance are essential to minimize risks and ensure a safe workout experience. After assembly, ensure all bolts and nuts are tightened securely. Test the equipment for stability and proper function. Adjust components as needed for optimal performance and safety. Once the Total Gym is fully assembled, it’s crucial to ensure all bolts and nuts are tightened securely. Use the tools provided in the kit or recommended ones to avoid stripping screws. Start by double-checking the frame and base connections, as these bear the most weight. Next, tighten the glideboard and rail attachments, ensuring smooth movement. Finally, secure the pulley system and wing grips firmly. Proper tightening prevents wobbling and ensures safety during workouts. Refer to the manual for specific torque recommendations. Failure to tighten adequately may lead to equipment instability or damage. Always recheck after initial use to ensure everything remains secure. After assembly and tightening all components, test the Total Gym for stability to ensure it’s safe and ready for use. Start by gently rocking the frame side to side and front to back to check for any wobble. Lay on the glideboard and slowly move it along the rails to ensure smooth, even motion. Apply gentle pressure to the wing grips and accessories to confirm they’re securely attached. If any instability is detected, recheck and tighten all bolts and nuts as needed. Finally, perform a few light exercises to verify overall stability and functionality. A stable setup ensures optimal performance and safety during workouts. Regular maintenance and proper storage are crucial for extending the life of your Total Gym. Clean moving parts, lubricate rails, and store in a dry area to preserve functionality. Regular cleaning and lubrication are essential for maintaining your Total Gym’s performance. Use a soft, dry cloth to wipe down the glideboard, rails, and other moving components. For tougher stains, dampen the cloth with water, but avoid harsh chemicals or abrasive cleaners. Once clean, apply a silicone-based lubricant to the rails and pulleys to ensure smooth operation. Repeat this process every 1-2 months, depending on usage. Proper maintenance prevents friction damage and extends the lifespan of your equipment. Always refer to the manual for specific lubrication recommendations. Regular care ensures your Total Gym remains in optimal condition for effective workouts. Proper storage is crucial for maintaining your Total Gym’s condition and longevity. After cleaning, ensure all parts are dry to prevent rust or corrosion. Fold the equipment according to the manufacturer’s instructions and secure it with the provided straps or clips. Store the unit in a dry, cool place away from direct sunlight and moisture. Avoid leaving it in areas prone to humidity or extreme temperatures. If storing for an extended period, cover it with a breathable cloth to protect against dust. Never store heavy objects on top of the Total Gym, as this could cause damage. Regularly inspect the stored equipment for any signs of wear or damage. Proper storage ensures your Total Gym remains ready for use whenever you need it.2.2 Detailed Parts Inventory
Step-by-Step Assembly Process
3.1 Unpacking and Organizing Components
3.2 Assembling the Frame and Base
3.3 Attaching the Glideboard and Rails
3.4 Installing the Pulley System and Cables
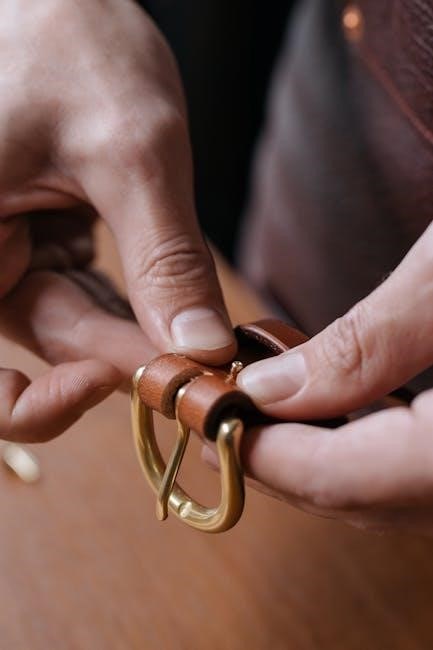
3.5 Securing the Wing Grips and Accessories
Safety Precautions and Warnings
4.1 General Safety Guidelines
4.2 Caution Labels and Hazard Information

Post-Assembly Setup and Adjustments
5.1 Tightening All Bolts and Nuts
5.2 Testing the Equipment for Stability
Maintenance and Storage Tips

6.1 Cleaning and Lubricating Moving Parts
6.2 Proper Storage to Preserve Equipment